Did you know that some starfish have more than 5 arms? But 5 arms is what we commonly associate with this wonderful marine invertebrate. Below is a picture of my favorite starfish, the royal starfish
(Astropecten articulatus). Its glorious color and shape helps explain why this species is well liked as a design element in jewelry making.
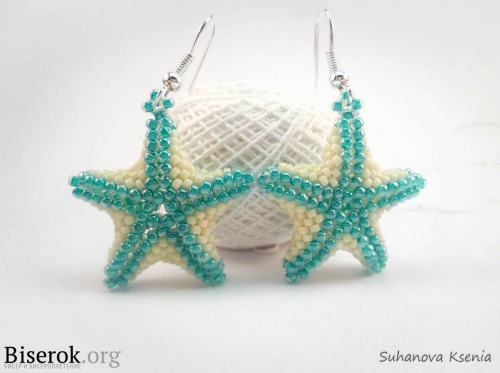
Here are 2 tutorials for beaded starfish earrings.
The first tutorial is the classic beaded one. It is by Suhanova Ksenia over on Biserok.org. It is in Russian. Even with translation, it will take more experienced beaders to figure it out.
If you are struggling, check out this
English language video tutorial by Margherita (marghebeadbybead) who is a bilingual Italian beader. Her design is different in that she incorporates a rivoli in the center and the arms are not as long.

Someone once emailed to ask why her starfish arms were not flat when she tried to adapt the pattern without the base. It was obvious the beaded base was crucial to the design.
If you would like a simple starfish design, then check out
Heather Boyd's design on her video tutorial. It is an effective way to wire beads together - the wire has to go through all the beads twice except the small seedbeads at the end of the arms and the central bead. Add another arm and you got yourself a star!
 Before You Go:
 ______________________________
Original Post by
THE BEADING GEM Jewelry Making Tips -
Jewelry Business Tips