It is tricky for wire work beginners to use cabochons. The solution for a wire framed design is to use drilled beads. Judy Larson, whose tutorials I have featured before, used drilled beads for this
fabulous wire wrapped pendant tutorial and this elegant
double holed beads for a link bracelet. My tutorial here for a pair of coiled wire framed gemstone earrings uses drilled round gemstone beads. These are lovely Madagascar rose quartz beads from which I received from
Nelson Beads a while ago for review.
What you will need :
- 8 or 10 mm drilled round beads
- 20G wire for the frame
- 26G wire for coiling and wrapping - you can use 28G but it looks better with 26G
- dowel or something cylindrical like a marker pen approximately the same diameter as the beads
- pin vise (see my post How to Twist Wire Using Pin Vises)
- chain nose pliers
- medium bail forming pliers (optional)
- nylon jawed pliers (optional)
- nylon hammer and steel block
- 2 ear wires
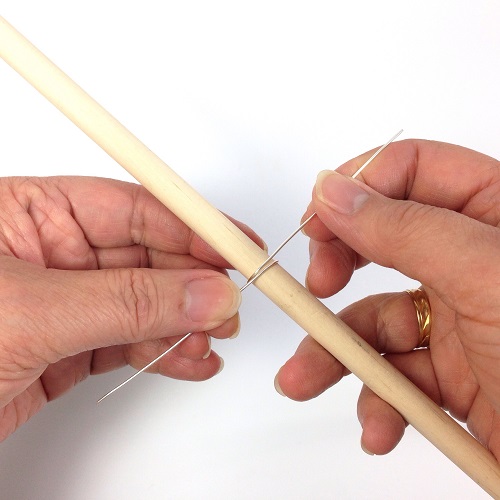
Cut about a 5 inch length of 20G wire and wrap it around the dowel.
Work harden (not flattening) it by hammering a few times with a nylon hammer. This will help the wire retain the shape.
Use your chain nose pliers to bend the wire ends about where they meet. Straight the upright wires with the nylon jawed pliers. Use a folded up paper towel to stroke the wires if you don't have the nylon jawed pliers.
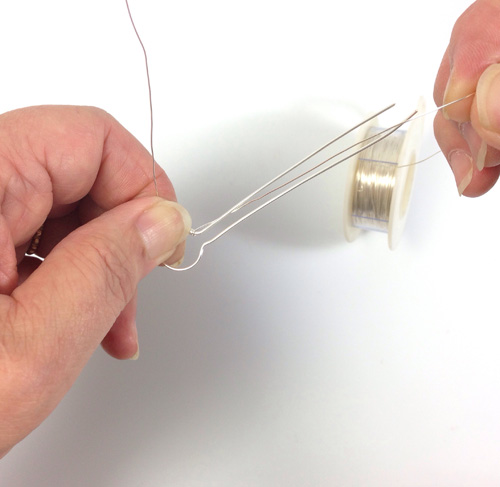
Work from the 26G wire spool - this saves having to figure out how long of a wire you need for the coiling/wrapping. Allow a generous wire end and start wrapping around the rounded frame. As the frame is still open at this point, it is easy to pass the wrapping wire in between the upright wires of the frame.
Make sure you pull firmly (but not too hard so it breaks) on the wire. Most beginners tend to be too gentle and the work is too loose. Remember to push the wire coils closer together as you work along.
Stop coiling when you get half way round the frame as shown below and cut the wire leaving a generous tail. Now coil another length on the other side of the frame.
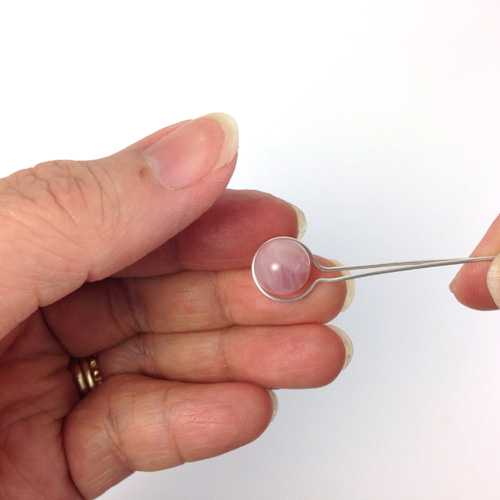
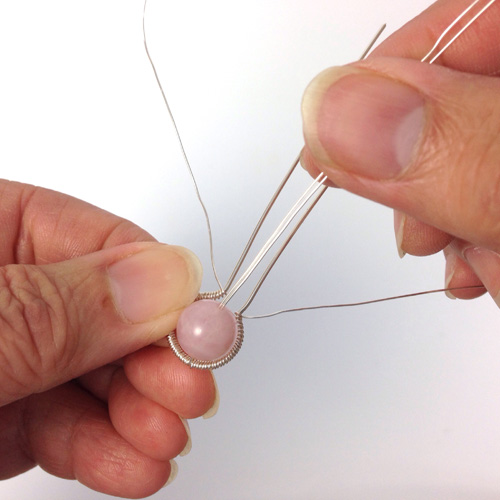
Once both sides are done, you can feed the bead onto the wires which met at the bottom of the frame.
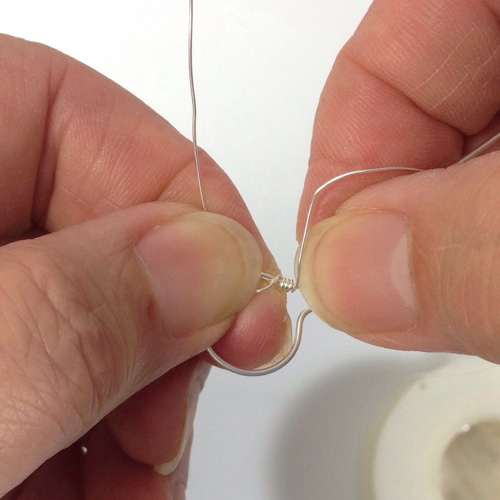
Twist this pair of wires together using the pin vise which will reduce the number of wire tails to deal with.
Wrap the two remaining 26G wire tails around the upright portions of the frame. These two thinner wires were twisted together as well. The frame around the bead must be firm ie it shouldn't move.
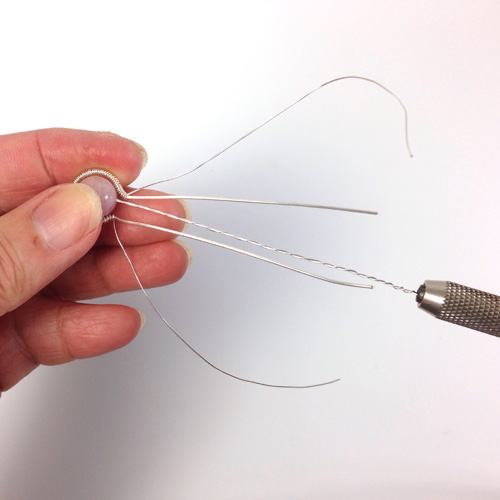
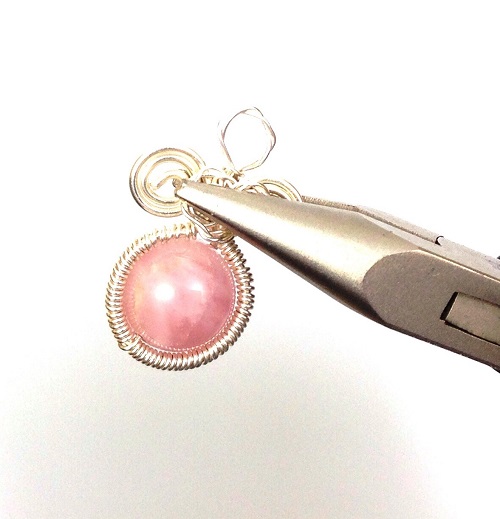
Make a wrapped loop out of the first set of twisted wires. I like using the bail forming pliers for this because the other earrings' wrapped loop will be exactly the same size. You can mark your chain nose pliers with a marker pen to help you do the same thing.
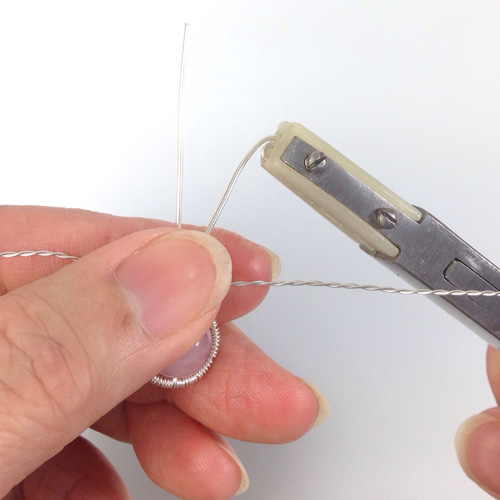
Make the other earrings to this same stage so you can trim all the wire ends to the same lengths so the scrolling will be even. Scroll the thicker wire first as these will be at the back.
I like to hold the scroll with my nylon pliers to reduce the chances of marring the wire. Tip - keep the pliers holding the scrolled portion still. It is my
left hand which is doing the scrolling of the wire.
When the scrolling is completed, use the chain nose pliers to flatten down the twisted wire scrolls against the thicker wire scrolls. Add the ear wires and you're done. It did occur to me that had I made the thicker wire scrolls even larger, this would look like a pair of very buxom angel earrings! Hahaha.
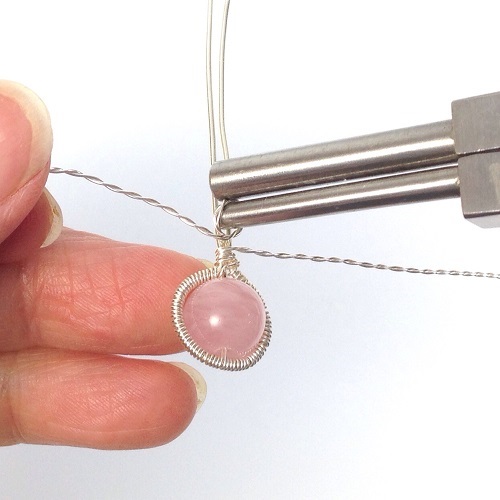
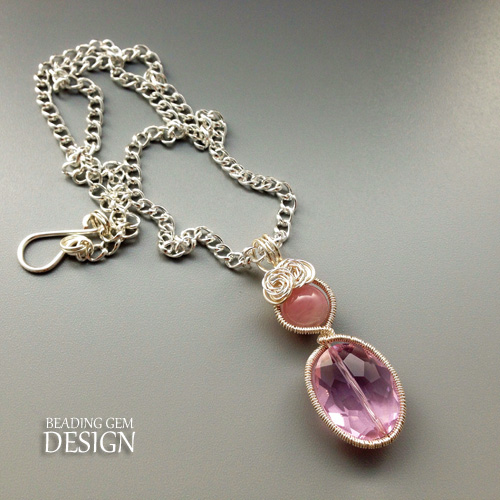
The extended pendant version with a pink crystal was created by making an extra long coiled frame which was twisted together to separate the crystal and the bead. I made a multiple wire coil for the bail area (see
How to Wire Wrap Bails for ideas). Now this pendant looks like a pink goddess with curly hair to me!
Photography iPhone 5 with camera+ app, Modahaus TS320 tabletop studio. Final designs in natural light; tutorial photographs in artificial light.
How to Photograph Jewelry Webinar info.
Before You Go: ______________________________
Original Post by
THE BEADING GEM Jewelry Making Tips -
Jewelry Business Tips